Tuesday, December 24, 2013


FRIDAY, 15 JANUARY 2010


Re-Inventing the Lamington: The Base Recipe

(In which Mr. P outlines exactly what makes a lamington.)

Okay people. Before I embark on my 10-day celebration of the lamington proper, I think it would be a good idea to clear up a few issues that have presented themselves since I first introduced the idea of this series and contest.

Some readers have emailed me asking what exactly a lamington is, and what makes it a lamington, as opposed to anything else. It would appear that the Australian cake is not as famous as it deserves to be. I can only hope that the Global Bake Off that seems to be taking place currently is going to put paid to that.

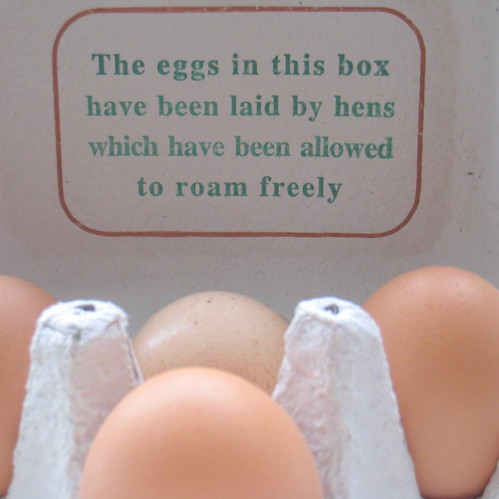
Happy eggs = Delicious lamingtons! Thanks to Aunty Sue and her hens for the free eggs. 

Lamingtons are essentially cake sandwiches. Not like whoopie pies (although lamington whoopie pies really would be something special), but actually sandwiches of (usually génoise) cake, put together with a filling (traditionally jam), before being dipped in a chocolate icing and dessicated coconut. They were apparently first made in Toowoomba, Queensland, by the 2nd Baron Lamington's chef, an Armand Gallad, who, when called upon at the last minute to provide something to feed unexpected guests (hey - we've all been there, Armand), cut some cubes of the previous day's cake, and coated them with chocolate and coconut. Ms. Humble has written a hilarious account of the man who gave the lamington its name, as well as entering my contest no less than four times (you've got to love a woman with dedication!) here, so I suggest you go and take a look if you have further questions. Be sure to leave a tip in her basket.


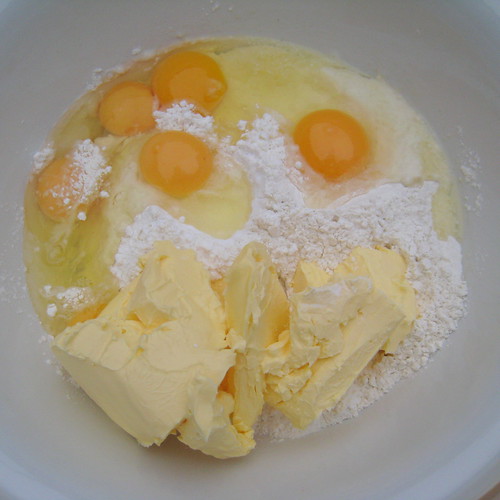
I always thing the ingredients look really nice, pre-mixing. Tell me I'm not alone.

Now. I have also had emails and comments disagreeing with my lamington definition; that lamingtons are only true lamingtons if they are plain cake, with chocolate and coconut, but no filling. No jam, no cream, no nothing. I am not deliberately setting out to court controversy, but, for the purpose of this competition and challenge (which are mine, after all) I am throwing these suggestions out of the window. In my challenge, the lamingtons do not have to use cake, and they can be filled or unfilled. I prefer a little something in mine - the best one I had in Oz was sandwiched with cool, thick whipped cream, and got more than a little sandy as I ate it on Manly Beach in Sydney).

What is important for me is that the lamingtons must be dipped in something (chocolate, frosting, jam, sugar glaze etc. etc.) and then rolled in or sprinkled with something else (coconut, sugar, hundreds and thousands, peppercorns etc).

Well, maybe not peppercorns.

I am not trying to damage Australian food culture. I actually think the opposite is true - I want more people to know about these simple cakes, that are so much fun to make and to eat.


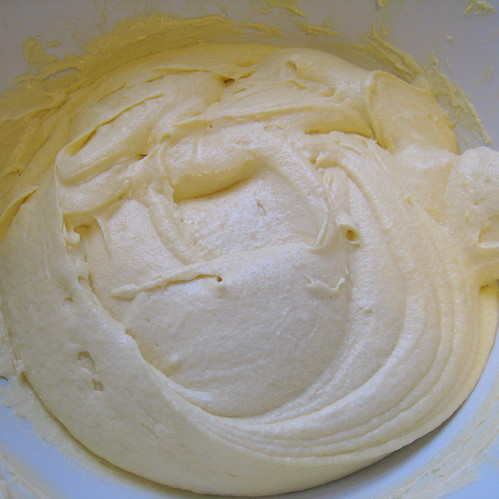
It's not génoise cake. But I like it.

With that cleared up, I can move on. The WORST thing about most of the bad lamingtons I ate in Australia (and I did have one in most places we stopped at - with coffee. Australian coffee puts ours to shame.) was either that the cake was dry, or that the chocolate coating tasted cheap and nasty. These flaws are, in my eyes at least, unforgivable. Actually, no. Poor quality chocolate I can just about handle. But biting into a dry cake is like treading ankle-deep into a puddle whilst wearing your best shoes. It just ruins your day.

Thus in all my lamington recipes, I'll be using only good quality chocolate, and have tinkered with my usual cake recipe to ensure a moist cake that is as fluffy and light as can be. Normally, I would get around the dryness issue by soaking the baked cakes in a sugar syrup. But the process of making lamingtons is already rather hands-on, and I didn't want to make it any more involved. The key change is to add potato starch, or fecola di patate, which I get from the Italian section of my local deli. Corn flour does the same job, mind you.

These amounts make two 20cm square sponges, which will make 32 lamingtons if you cut them into 4cm squares. (Promise - you can check my maths if you like!) But since half the fun of re-inventing the lamington is making them different shapes, I think we can ignore that. You'll just get a few more, or a few less.

And so, without further ado...

To the lamington - the greatest cake in the Southern Hemisphere!

Perfect!

Mr. P's Lamington Base

You will need:

6 eggs (large)
375g butter, room temperature
375g granulated white sugar
325g plain flour, sifted
75g potato starch, or corn flour
2 tsp baking powder
1 tsp bicarbinate of soda

  1. Pre-heat the oven to 180°C. Grease two 20cm square cake tins with butter. I didn't bother to line them as well, since I trim the edges of my lamingtons anyway and was in a flippant mood. You must decide for yourself if you are feeling brave enough not to line either.
  2. In a large bowl, mix everything together on a slow speed with an electric hand mixer, until combined. You may need to add a splash of milk. This takes a bit longer than for a normal cake; this is a lot of mixture we're making.
  3. When combined, transfer half of the mixture to each tin. Smooth the tops and bake for 25 minutes. Cool for 5 minutes in the tins, and then turn out onto a wrack. When cool slice as needed.

TUESDAY, FEBRUARY 1, 2011


Valentine's Day Chocolate Raspberry Mousse Cake


For days I have anxiously waited to take a bite of this triple layer cake and savour the wonderful marriage of raspberry and chocolate flavors. Why on earth did I wait days, you might wonder, when this cake can certainly be created and ready to eat in one afternoon? Well I had a series of mishaps that turned my yearning to eat cake into a frenzy of desire. It all started four days ago. I successfully baked the first layer of the cake and set it aside to cool.  An hour later I went to take a picture of the cooled cake and I bumped my camera and it went crashing to the floor. Nervously I looked through the viewfinder and saw a hazy purple image of my cake. Thinking I had to go buy a new camera, which I couldn't do for a few days, I froze the cake to finish it later.

Two days later my husband picked up the camera to see what was wrong, and it seemed to be working fine. Go figure. So I pulled the cake out of the freezer and started to make the chocolate mousse. I wanted to get pictures of each step of my recipe and I tried to hold my camera in one hand while using my other to fold whipped cream into melted chocolate. I struggled and took too long.  My mousse wasn't light and fluffy as it should be.  It had little bits of hardened chocolate throughout.  Certainly not the mousse I wanted to have in my cake. I poured the rejected mousse into a bowl, which my husband happily took off my hands. He was just as anxious to sink his teeth into the triple layer cake as I was, but was pacified for the time being.  I was able to make a perfect batch of chocolate mousse, layer it on top of the cake, take pictures, and get it in the refrigerator before heading off to the pool (had to get my exercise in knowing how many calories I would soon be consuming).  I rushed home, whipped up the raspberry mousse, and shot some photos just before the sun went down.  I've been trying to use natural light to take my pictures, so I decided to wait to shoot the final photographs until the next day although my mouth was sure watering by this point. Licking the spoon would have to suffice for a little while longer.
I woke up to sun shining brightly in my bedroom, hopped out of bed, and set out to take my pictures.  I got the cake from the refrigerator and was elated to see how wonderful it looked.  I washed my raspberries and adorned the cake with a heart. It took me a little time to set up my first shot then I grabbed my camera, turned it on, and wanted to cry. A big spot had appeared on the viewfinder which I tried to clean off. That didn't work and it wasn't on the lens either. It must be an internal problem and I couldn't find a solution. O.K., so I had, at that point, relinquished myself to the fact that I would need to purchase a new camera. I could use an upgrade anyway, but my desire to get pictures of this cake had now escalated into obsession. I didn't want to put the cake back in the refrigerator and run to the electronics store, so I aimed my broken camera at the beautiful cake trying to keep the big spot off to one side. I got a few descent shots and decided they would have to do.

My next step was to get a perfect slice of cake to photograph.  I thought this would be very simple.  Oh, wrong again. I got a sharp knife warm by running it under hot water and made two very clean cuts. I went to lift the cake out of the pan, but couldn't get under the cake. I had forgotten to turn the base of my springform pan upside down and the lip was a 1/4" deep. There was no way to lift a slice neatly out of the pan base keeping the remaining cake intact. As my impatience grew, I decided to forgo having a nice shot of the slice of cake in front of the whole cake.  A beautiful shot of a single slice would be fine.  Not worrying about how the whole cake would look, I heartlessly cut it in half and scooped out one side. I needed to be able to get a spatula under the other half of the cake in order to remove it cleanly from the pan's base. It took some effort, but I finally got a beautiful slice of cake for my photograph.  At this point though, I was so  frustrated that I grabbed a spoon and dug into the mutilated portion of the cake. Yes, I know it was still morning, but hey, the cake has eggs, dairy, and fruit in it.  Wouldn't that be considered an acceptable breakfast? Oh, as I put the first spoonful in my mouth, I let out a big sigh. My taste buds were so very happy. The waiting had come to an end. With each perfect bite I could taste the rich gooey flourless chocolate cake, the silky smooth chocolate mousse, and the lightly fruity white chocolate raspberry mousse. I stood in the middle of my kitchen eating joyously forgetting the stress of it all. When I had my fill and had licked my spoon clean, I grabbed my camera and got back to the work at hand.  I finally got a perfect shot of a slice of this decadent cake. One good picture was enough to make me happy.  What do you think, don't you just want to reach in your monitor and grab a slice for yourself?

I'm sure your experience making this dessert will go much more smoothly, at least I hope so.  I will admit, that even without all of my mishaps, this recipe is challenging. Each layer of this cake uses different techniques and requires time and effort. It is also not a budget recipe, by any means. You'll use almost 2 pounds of chocolate, 2 1/2 cups of heavy whipping cream, and 1 1/2 pounds of raspberries. However, I assure you it is worth every penny and every minute of time spent. Each layer of this cake is delicious all on it's own, so if you don't want to create the cake, just make one of the three recipes. Your mouth will definitely thank you!

I made my cake in a a heart shaped springform pan,but realize that most people don't own one. Just make your cake in a 9" round springform pan and arrange the raspberries on top of your cake in a heart if you are serving the cake on Valentine's Day. For other occasions, you can alternately top it with whipped cream or shaved chocolates for a beautiful effect. Also, I have a fondness for Peter's Burgundy Semi-Sweet Chocolate, which I use in all my chocolate recipes. If you prefer a more intense and bitter chocolate flavor swap bittersweet chocolate for the semi-sweet. Use chocolate that you enjoy eating out of hand, as you will definitely taste a poor chocolate in this recipe.

Chocolate Raspberry Mousse Cake

Flourless Chocolate Cake Layer:
7 ounces semi-sweet chocolate, finely chopped
6 tablespoons unsalted butter
1 1/2 teaspoons pure vanilla extract
4 large eggs, separated
pinch of salt
1/3 cup light brown sugar

Preheat oven to 325 degrees Fahrenheit. Prepare a  9" springform pan or heart shaped springform pan by removing and turning the base upside down, setting it inside the ring, and clamping the pan. Generously grease the sides and base of the pan with butter.

Place chocolate and butter in a large heatproof bowl. Prepare a double boiler by filling a saucepan with 1" of water and setting it over low heat on the stove.  Set the chocolate filled bowl over the pan and allow the chocolate and butter to melt slowly, stirring often. Remove melted chocolate from stove top and allow to cool for about 5 minutes.  Stir in the vanilla and egg yolks.

Whisk egg whites and salt until foam forms.  Sprinkle in about 1/2 of the brown sugar and whisk until combined.  Add the rest of the brown sugar and whisk to soft peaks (pick up the whisk and the eggs should form a peak but flop over.) You can use a stand mixer or handheld mixer for this process if you desire, just don't over beat the eggs or they will become like Styrofoam.


Gently fold 1/3rd of the egg whites into the chocolate mixture. Fold in remaining egg whites being careful to not deflate the egg whites. Pour batter into the prepared pan.  Bake for 15-18 minutes. The cake will have risen, the edges will look set, and the center will spring back when touched. Set aside to cool for one hour. Once cooled, the cake will sink down in the center.

Chocolate Mousse Layer:
1 1/2 cups heavy whipping cream
12 ounces semi-sweet chocolate, finely chopped
3 tablespoons water
3 tablespoons sugar
3 egg yolks


Whisk whipping cream to soft peaks. Set aside. Melt the chocolate in a large bowl.  Click here for detailed instructions. Pour water and sugar in a small saucepan and bring it to a boil over medium heat. Stir until the sugar is dissolved creating a simple syrup. Whisk egg yolks in a medium bowl.  Continue to whisk while slowly adding a small amount of simple syrup.  Slowly drizzle in the remaining simple syrup continually whisking.  Combine eggs with melted chocolate, stirring until well incorporated.  Heat chocolate mixture in the microwave for 15 seconds then stir. Add one third of the whipped cream and whisk until well incorporated.  Gently fold in the remaining whipped cream until fluffy.  Pour mousse over the chocolate cake layer.  Spread evenly over top then refrigerate the cake for 30 minutes.

White Chocolate Raspberry Mousse:
1 tablespoon water
1 teaspoon unflavored gelatin
16 ounces frozen raspberries
1 tablespoon sugar
6 ounces white chocolate, finely chopped
1 cup heavy whipping cream

Garnish:
8 ounces fresh raspberries, rinsed and patted dry


Pour water into a small bowl.  Sprinkle gelatin over top and set aside for 5 minutes to bloom. Pour frozen raspberries into the bowl of a food processor and puree. Pour puree into a fine mesh strainer set over a bowl. Allow the raspberry juice to drip into the bowl. Press on the solids to get as much juice out of the puree as possible.  Discard solids. Pour raspberry juice into a small saucepan.  Add sugar. Bring to a boil over medium heat.  Continue to boil, stirring often until the juice reduces to 1/2 cup, about 5 minutes. Remove from heat and add the bloomed gelatin. Stir until the gelatin is dissolved. Put chopped white chocolate into a large bowl.  Pour hot juice over chocolate.  Allow to sit for 3 minutes.  Stir until melted and smooth.

Whisk cream to soft peaks. Whisk 1/3rd of the whipped cream into the white chocolate mixture. Gently fold in the remaining whipped cream until light and fluffy. Pour over the chocolate mousse layer and spread evenly. Refrigerate for at least 3 hours.


Remove from refrigerator.  Run a thin knife or offset spatula around the edge of the pan.  Release the latch on the pan and carefully remove the metal ring from the cake. Set on a cake stand. (I usually put a dab of frosting or something on the plate to hold the cake in place.) Arrange raspberries in a heart on top of the cake just before serving.

Cake (without raspberry garnish) will keep in the refrigerator for up to 5 days. Keep in a cake dome to keep refrigerator smells out. Serves 8-12.


If you like this recipe, please share it with others by using the share buttons below. I really appreciate being Stumbled Upon and Pinned, and am always grateful to those of you that share my ideas on your website. I do request that you don't post my entire tutorial, but rather share a picture with a link. If you make this recipe, I'd love for you to send me a photo to beth@hungryhappenings.com so that I can share it in my Reader's Gallery. I link up to lots of websites that are listed hereThank you for visiting Hungry Happenings
-Beth

Mini Heart Cake

Another year has come and gone.
So many things have changed since I first posted my Rose Cake on this day last year.
Got a new job.
And have gotten to know some amazing people.
You guys.
Thanks for the support.  The laughter.  The challenges.  The inspiration.
I am so thankful that you are willing to share some of yourself here.
So today (Feb. 1st) , on my thirty-fifth birthday, I want you to know that
You are my gift.
Thank you!

Simple Smiley Face Lollipops made from Oreo Cakesters


from http://www.hungryhappenings.com amazing blog

I've always loved the simplicity of a smiley face; they, well, make me smile. My goal today is to make you smile! 

Many of my edible craft recipes, admittedly, do require quite a bit of work. Well, not this one. Are you smiling yet?

Grab a package of Oreo Cakesters, some lollipop or craft sticks, yellow candy melts, and a food coloring marker and in about 20 minutes you can have your own smiley face lollipops.

Go...

Smiley Face Lollipops (makes 12)

Before you begin, if you don't have experience working with or melting candy melts, read myChocolate Making Tips tutorial.

Ingredients:

12 Oreo Cakesters (I used Doublestuff)
14 ounces melted  yellow candy melts* (or use white and color with yellow candy coloring)
black food coloring marker

*You want your candy melts to be kind of thick so you get a nice coating on your cakester, however, if your melted candy melts are too thick, you may need to add some Paramount Crystals (recommended) or a bit of vegetable oil in order to thin them out. Add a very small amount at a time until you have the desired consistency.

Supplies needed:

glass or mug
parchment paper
baking sheet

Instructions:


Unwrap Oreo Cakesters and insert a stick into the cream center. Pour your candy melts into a glass or mug. Dip the Cakester into the candy coating. Lift the Cakester out and allow excess candy coating to drip off. Set on a parchment paper lined baking sheet. Repeat, coating all the Cakesters. Place in the freezer for 5 minutes. Remove and allow the pops to come to room temperature.

Use a food coloring marker to draw smiley faces onto your lollipops. Allow food coloring ink to dry before packaging in cellophane bags. Or just tie some ribbon onto the lollipops and arrange in a container to set on your table at your party.

That's it. Simple, right?

If you like this recipe, please share it with others by using the share buttons below. I really appreciate being Stumbled Upon and Pinned, and am always grateful to those of you that share my ideas on your website. I do request that you don't post my entire tutorial, but rather share a picture with a link. If you make this recipe, I'd love for you to send me a photo to beth@hungryhappenings.com so that I can share it in my Reader's Gallery. I link my recipes up to lots of websites that are listed here.
Thank you for visiting Hungry Happenings 

Beth


PANTRY STAPLES: COCOA COCONUT BITS FROM "HTTP://WWW.SPROUTEDKITCHEN.COM/HOME/2012/3/7/PANTRY-STAPLES-COCOA-COCONUT-BITS.HTML

 " BLOGSPOT


These may be the new favorite treat around here. I tried a brand called Hail Merry coconut macaroons at a friends house last weekend and with their simple ingredient list, I knew I could recreate them myself. A small ingredient list, all in one bowl AND delicious. I don't like selling people on recipes, but decadence doesn't often come by so simply.
In keeping up with the proposed Pantry Staples series, I am adding a few notes on my most frequently used fats. The list is pretty short, but there are controversies over canola, grape seed, corn and other vegetable oils, so I stick to the few mentioned here. Again, I am not a dietitian nor do I have any nutritional degrees. These are my opinions based on experience and light research.
Extra Virgin Olive Oil: This is a monounsaturated fat which is said to be a "good fat" that can help lower cholesterol and prevent heart disease. The range of flavors in olive oil is pretty impressive. You can get under ripe, grassy, creamy, fruity and more. Depending where you live, there may be a local brand at your farmer's market, but there are a ton of markets and specialty stores with great brands as well. I typically have two bottles - one moderately priced one that I use for cooking (which should only really be used for moderate heat for the integrity of the flavor and nutrition), and another slightly pricier bottle that we use for dipping and homemade salad dressings, where the flavor is truly appreciated. Speaking of dressing, I love using this lemon oil from Stonehouse. Not overly lemony, just perfect. It usually has a shelf life of about a year, and should be kept in a cool, dark place to keep it as fresh as possible.
Extra Virgin Coconut Oil: This is my quickest answer to a non-controversial, high heat fat. It is a saturated fat, so it has made a strong come back from a history of being frowned upon for that reason. There are studies that say it is easier to digest than other fats, and the presence of certain acids make it good for skin care, stress relief, weight loss and immunity. It is a solid at room temperature, much like butter, so can be gently melted to be used in baked goods or warmed in a pan for a sauté.
There are some brands that smell more coconut-y to me, but for the most part, I find the flavor pretty versatile. You want to purchase an extra virgin, unrefined version. I keep mine in the pantry because I use it pretty often, but if you don't, it lasts longer in the refrigerator.
Nut Oils: These babies come with a higher price tag and distinct flavors, so I mostly use them as finishing oils or in salad dressing. A nice drizzle of hazelnut oil on some roasted squash, or pistachio oil in a quinoa salad - they have the essence of their nut, while also giving that moisture to the overall texture. The flavor changes with heat, so if anything, only use them with low heat. Like nuts in their whole form, they can go rancid fairly quickly, so should be kept in the fridge if you don't use them often. Be sure to check the dates where you purchase these oils too, as you want to buy from somewhere with a quick turnover to help ensure you're getting a fresh bottle.
Organic Butter: While dairy is composed of saturated fats, which affect cholesterol levels, butter is a natural food, so it still comes out as a better option than some of the other oils marketed as "healthy fats."There is no substitute for this flavor, first and foremost. I like butter on fresh, crusty bread or on top of weekend pancakes, but try and be conscious about using it in moderation. Because of the milk solids, butter burns at high heat, so is best used with lower heat cooking or in baked goods. The work around for this heat specific temperment is to clarify the butter, which is a simple process that removes the milk solids, so you can cook with it at higher temperature. My New Roots has a great post on how to make it and why. I do my best to buy organic dairy whenever possible. These days, it's pretty easy to find.
Sesame Oil: This oil has both polyunsaturated and monounsaturated fats, antioxidants and several vitamins and minerals. Like any of the other oils, these health benefits are still to be considered with a high caloric content, so should be used in moderation. The flavor is pretty assertive, so I use sesame oil when that flavor is welcomed, mostly Asian inspired meals. It can handle higher heats, but definitely has a nutty flavor to it. You can purchase plain or toasted sesame oil, and while I love the flavor of the toasted, it is pretty strong, so with cooking, I often go half toasted sesame and half coconut oil to mellow it out and avoid any burning smells or flavors. I keep the toasted variety in the fridge for a longer shelf life.
COCOA COCONUT BITS // Makes 20
Because these are vegan, they can also be enjoyed raw. You can scoop them into balls, chill them for about an hour, and enjoy as such. I baked mine at a low heat, because it gives them a texture of somewhere between truffle and cookie and I really love that. A crisp crust and a soft center. Perfection.
1 1/2 cups dried, unsweetened coconut (sometimes tough to find at markets, easy to get online)
1/2 cup natural cocoa powder
1/3 cup rolled oats
1/2 cup grade b maple syrup
1/4 cup extra virgin coconut oil
1/2 tsp. vanilla extract
1/4 tsp. cinnamon
In a mixing bowl. Combine the coconut, cocoa powder and rolled oats together. Stir in the maple, coconut oil, vanilla and optional dash of cinnamon. Mix to coat everything evenly. Set in the fridge for 20 minutes.
Preheat the oven to 215'.
Line a baking sheet with parchment paper. Using a mini scooper or your hands, make 1 inch balls and set them on the baking tray (they don't spread, ample space between is not important). Bake them on the middle rack for 20 minutes. Remove to cool.

BROWNIES FOR DOLCE & GABBANA

October 30th, 2010  | Category: BrowniesChocolate

Brownies for Dolce & Gabbana
I have to admit, I was a bit lost when Dolce & Gabbana requested me to create a recipe for their digital magazine, Swide.
As soon as I read that email, I wished I were Pierre Hermé. He’d know exactly what to do. Who am I to create anything for D&G?
Right after I picked my self-confidence up off the floor, I visited their website for inspiration and came across the Fall/Winter 2011 runway show. As I watched one seductive dress after another, I knew it had to be something with chocolate. Plus, I had the honor of shopping side by side with Domenico and Stefano at Fouquet in Paris, so I know how much they like chocolate.
Now, I do not know much about fashion. My knowledge might even be limited to a few episodes of Project Runway, and the encounter at Fouquet will probably be the closest I’ll ever get to a D&G anything, but I do know my chocolate recipes. And I certainly know a great brownie. One that had the honor of being featured in a Washington Post article by a hero of mine. Yes, I had to bake those brownies.
Because if it is good enough for Nick, it is good enough for everyone. But this is D&G and the recipe was to be exclusive for Swide, so I started thinking… What would make a brownie more seductive? Perhaps a coating of velvety hazelnut butter? Definitely.
What I saw on the runway was quite seductive, but so wisely (and tastefully, of course) camouflaged with transparent fabric. A brownie coated with hazelnut butter would have looked too naked, so I still needed another element. Something to cover the skin just enough to entice.  Then the show ended and the whole team of tailors appeared on screen, looking proud and confident. To me, it was an appreciation and celebration of craftsmanship. It was the most inspiring part of the show and I just had to incorporate that into the recipe as well.
I thought, wouldn’t a chocolate lace decoration be perfect? Chocolate lace? As soon as I asked myself that question, I wished I were Jacques Torres. He would have piped what I had in mind in the blink of an eye.
Me? It took me three attempts, 30 minutes each.
Chocolate Lace
The first one turned out horrible. The second one broke into pieces. Damn! Those brownies had to wear lace! Finally, the third one was good enough to top that brownie. How I wish I were fast enough to do it with tempered chocolate, but try piping tempered chocolate for a duration of half an hour with the smallest tip and you’ll see it is almost impossible – unless you are Jacques Torres, of course.
Brownies for Dolce & Gabbana 2
There’s no possible way to keep the chocolate in the piping bag fluid for longer than 10 minutes. I tried using a hair dryer to heat up the tip to get it going, but no luck. A stencil would have been extremely helpful, but that wouldn’t have been haute couture, now would it? And it certainly wouldn’t have celebrated craftsmanship.
Brownies for Dolce & Gabbana 3
Visit Swide for the complete set of photos and a short interview with me. And don’t forget to come back for the recipe.
A heartfelt thank you to Yiğit at D&G for this great opportunity.
BROWNIES with HAZELNUT BUTTER and CHOCOLATE LACE
Ingredients
For Brownies:
  • 10.5 ounces (300 grams) bittersweet (%70 cacao) chocolate, chopped
  • 2/3 cup (10 tablespoons/150 grams) unsalted butter, plus more for pan
  • 3/4 cup (105 grams) all-purpose flour
  • 1/2 cup (35 grams) Dutch-process cocoa powder
  • 1/2 teaspoon salt
  • 1+1/2 cup (300 grams) granulated sugar
  • 5 large eggs
  • 2 teaspoons vanilla extract
For Hazelnut Butter Frosting:
  • One 14-ounce (400 grams) jar smooth hazelnut butter
For Chocolate Lace Decoration:
  • 4.5 ounces (150 grams) bittersweet (%70 cacao) chocolate, chopped
Method
  1. To make the brownies, adjust the oven rack to the center of the oven and preheat the oven to 350°F/175°C. Butter a 9-by-13-inch rectangular cake pan, line bottom and sides with parchment paper and set aside.
  2. Place the chopped chocolate and butter in the top of a double boiler set over hot water and allow to melt slowly, stirring often. Set aside to cool for 10 minutes.
  3. Sift together the flour, cocoa, and salt into a medium bowl and set aside.
  4. In the bowl of an electric mixer fitted with the whisk attachment, whisk eggs and sugar until light and fluffy. Add the cooled chocolate followed by the vanilla extract, and whisk until combined. Fold in the flour and cocoa mixture with a spatula. Pour the mixture into the baking pan, smooth the top with a spatula and bake for 30 minutes.
  5. Allow to cool in the pan for a few minutes, then turn out and leave to cool completely on a wire rack. Trim the top crust and half-an-inch from each side and place in the refrigerator until chilled, for about 30 minutes.
  6. To make the hazelnut butter frosting, place the hazelnut butter in a small pot over low heat and stir until it is runny. Pour over cooled brownie, smooth the top with a spatula, place the frosted brownies in the refrigerator and chill completely, for about an hour.
  7. To make the chocolate lace decoration, place the chopped chocolate in the top of a double boiler set over hot water and allow to melt slowly, stirring often. Set aside to cool for 10 minutes.
  8. Place a 16-inch-long parchment paper on your work surface. Draw an 8-by-12 inch rectangular with a pencil, turn the other side and place it on a baking tray. Pour the melted chocolate into a piping bag fitted with the smallest (about 1 millimeter) plain tip and pipe the lace decoration the size of your brownie. Place the baking tray together with a large offset spatula in the refrigerator and wait until the chocolate is set, for about an hour.
  9. Transfer the brownie on your serving plate. Remove the chocolate decoration from the refrigerator and with the help of a large chilled offset spatula go underneath the decoration, pick it up and place it on the brownie. Heat the blade of a large knife with a heat gun or stick it in a cup of hot water for a few minutes and then wipe off the water (heating the blade helps with cutting through the chocolate decoration without breaking it into pieces), cut the brownie into 12 identical squares and serve.

Sakura Cherry Blossom Roll Cake

Pin It
Sakura Cherry Blossom Roll Cake

"you eat with your eyes first" is my belief when it comes to baking so i always aim to make pretty looking (of coz delicious) desserts and cakes. ever since knowing the existence of pickled cherry blossoms and how the japanese use it extensively in their beautiful wagashi and sweets, that came top of my most-wanted baking ingredient. so when i made the shiro-an white bean paste, i actually had this in mind already. this sakura roll uses the shiro-an both in the sponge and mousseline filling which i find it a really novel idea. having made sponges which require the use of almond or pistachio paste, i really liked the taste so i wonder what it'll be like to use white bean paste instead.

Untitled-1

the cherry blossoms are pickled in salt so you'll hv to rinse and soak them prior to use. when i got myself a pack of this from rakuten.jp, an online japanese ebay-like site, i was surprised at its taste. it wasn't floral as i expected it to be but more like pickled plums with a sourish tang. i also used the cherry blossom essence which dear felicia so generously gave to me.

Sakura Cherry Blossom Roll Cake

tastewise, i must say i'm really not such a big fan of the sponge coz it was way too eggy for me. it did taste better upon chilling but still. the saving grace was perhaps the mousseline filling. it was really really good, very smooth and creamy. i would think its a cross between creme patissiere and creme anglaise and i could really taste the shiro-an in there but not in the sponge. the mousseline is definitely a keeper though i would go with a different sponge in future.


recipe source : 孟老师的美味蛋糕卷

ingredients (makes one 36x26cm/14x10in sponge sheet) :
for the sponge :
40g unsalted butter, melted & cooled
50g shiro-an (japanese white bean paste), recipe here
25ml milk
80g egg yolks
15g caster sugar
150g egg whites
75g caster sugar
50g cake flour, sifted
for the shiro-an mousseline filling :
80g unsalted butter, softened
30g egg yolks
30g caster sugar
15g cake flour
160ml milk
1/2 vanilla bean pod, seeds scraped
60g shiro-an
directions :
1. rinse off the salt on the pickled cherry blossoms, soak them in water for 2 hrs and pat dry with paper towels. place them on 1/2 side of the baking tray lined with baking paper.
2. place egg yolks and 30g sugar in a bowl over a pan of hot water and whisk until pale & fluffy. combine shiro-an and milk together then add in the yolk mixture.
3. in another bowl whisk egg whites and 75g caster sugar until stiff peaks then fold the whites into yolks in 3 additions. sift cake flour over, mix well and fold in melted butter.
4. pour mixture onto the baking tray, level with a spatula and bake in a preheated oven of 180C for 12 mins or until golden. leave to cool then peel off paper carefully.
5. to make the filling, place softened butter in a bowl. in another bowl whisk together egg yolks, sugar, cake flour, milk & vanilla bean then whisk in the shiro-an.
6.cook mixture on stove until 84C then leave to cool over an ice water bath. whisk butter until homogenous then add in the above anglaise mixture in 2-3 additions.
7. spread a thin layer of filling onto cake, level with spatula then roll cake up starting from the end (without the sakura) using a sheet of parchment paper as a guide. keep the cake rolled up, wrap with parchment paper and tuck the sides of the paper in. refrigerate cake for 30-60 mins until firm. trim ends and serve.
Apt. 2B Baking Co.: I'll Bake You a Cake: If you are feeling sick, let me make you some soup. Feeling sad? I’ll make you something warm and comforting. Watching your weight? Well y...


I'll Bake You a Cake

Ombre Cake

If you are feeling sick, let me make you some soup. Feeling sad? I’ll make you something warm and comforting. Watching your weight? Well you look great to me, but I’ll make you something really healthy. Are you celebrating? I’ll bake you a cake.
 Ombre Cake

I am terrible at small talk, but really good with food. I’ll probably have a hard time explaining myself so let me make something with my own two hands to show you.
 

When you are away, I’ll send you a care package full of things to nourish you and make you smile. I'll wrap everything in newsprint and tissue paper and include a little note, but the love is in the treats.
 

I sent my brother and his wife a package today. For their new little ones, I’ll make birthday cakes like this one every year even if I am not with them because that's what I do. I know first impressions are everything so I made this one tall and pink and carefully constructed to make sure they know their aunt is no slouch.

To see how I put this cake together Check out this set of photos on flickr to accompany the instructions below

Almond Cake
adapted from Martha Stewart

1 1/2c, 3 sticks, softened butter
9oz almond paste, room temperature
1 1/2c sugar
6 eggs
1/2t vanilla extract
1 1/2c cake flour
3/4t baking powder
1/2t salt

Preheat oven to 350º and butter and flour 2, 8'' cake pans (3'' tall works best here) If you have shorter pans, I suggest you divide it into 3 pans to prevent overflow.

1. Sift together the cake flour, baking powder and salt.
2. In the bowl of a stand mixer or with a hand mixer, mix the almond paste and sugar until the almond paste is broken up into very small pieces. Add in the butter and beat until light and fluffy, 5min.
3. Add in the eggs one at a time, then add the vanilla. Fold in the dry ingredients.
4. Divide the batter between the two pans, smooth the tops and slide into the oven. Bake until golden brown and a toothpick inserted into the center comes out clean, about 30min. Cool the cakes in the pan for 10min, then carefully invert on a cooling rack and cool completely.
5. Once cool, trim each cake flat on the top, then in half horizontally. You will have 4 layers of cake when you are finished. If you baked the cake in 3 pans, just trim the tops flat.

Simple Vanilla Buttercream

1 lb softened butter
2 lbs sifted confectioner's sugar
1T vanilla extract
1/4-1/2 cup room temp milk
big pinch salt

In the bowl of a standing mixer or with a hand mixer cream the butter until it is well mixed, about 1 min. Gradually add in the sugar and beat until very light and fluffy, about 5 min. Add the salt and vanilla extract. Slowly stream in the milk until the frosting is soft, smooth and spreadable. If you plan on finishing the cake with an ombre design it is helpful if the frosting is very soft, but not runny at all. 

To Assemble the Cake

Trimmed Cake Layers
Vanilla Buttercream
12oz of cherry jam (raspberry or apricot would be great too)
Cake Turntable (not necessary, but SO helpful)
1. Anchor the first layer of cake to the turntable with a bit of buttercream. Spread a thin layer (about 1/3c) of buttercream on the cake, taking care to leave the frosting a little thicker on the edges to make a dam to hold the jam. Top the buttercream with a few tablespoons of jam and top with the next cake layer. Repeat until you use all of the cake layers finishing with the flat bottom of the last cake layer facing upward.
2. Crumbcoat the cake with a thin layer of frosting on the top and sides and refrigerate for at least 30min.
3. While the cake is chilling, prepare the colored frosting. Split the remaining frosting into 4 bowls, tint three of the bowls dark, medium, and very light pink using food coloring. I use gel food coloring and use VERY little even for the darkest frosting. Leave one of the bowls white for the top of the cake.
4. Starting at the bottom of the cake with the darkest color, use a small offset spatula to apply frosting to the bottom 3rd of the cake, then follow with the medium color in the center of the cake and the lightest color towards the top. Top the cake with white frosting to finish. Using a tall spatula, smooth the frosting on the sides as much as possible, don't worry if the colors mix together a little bit, but try not to smoosh them together. Smooth the top.
5. Finish the cake by holding the tip your offset spatula horizontally, pressing gently on the frosting at the bottom of the cake. Smoothly spin the cake turntable while simultaneously dragging the spatula up the side of the cake, stop when you get to the top. Wipe the spatula clean, then gently press the tip of the spatula into the middle of the top of the cake and spin the turntable while simultaneously dragging the spatula towards the outside of the cake.